- We ship to all 50 States and Canada Order Now 714-234-6899/714-452-7679

Cách làm mứt dừa thơm ngon ngay tại nhà chỉ trong vài bước đơn giản

Mứt dừa từ lâu đã trở thành hương vị quen thuộc trong mỗi dịp Tết cổ truyền của người Việt. Những sợi dừa trắng ngần, giòn dai hòa quyện vị ngọt vừa phải không chỉ khiến người lớn thích thú mà trẻ nhỏ cũng mê tít. Điều tuyệt vời là bạn hoàn toàn có thể tự tay làm món mứt dừa thơm ngon này ngay tại nhà với cách thực hiện vô cùng đơn giản, để khay bánh mứt ngày Tết thêm tròn vị sum vầy.
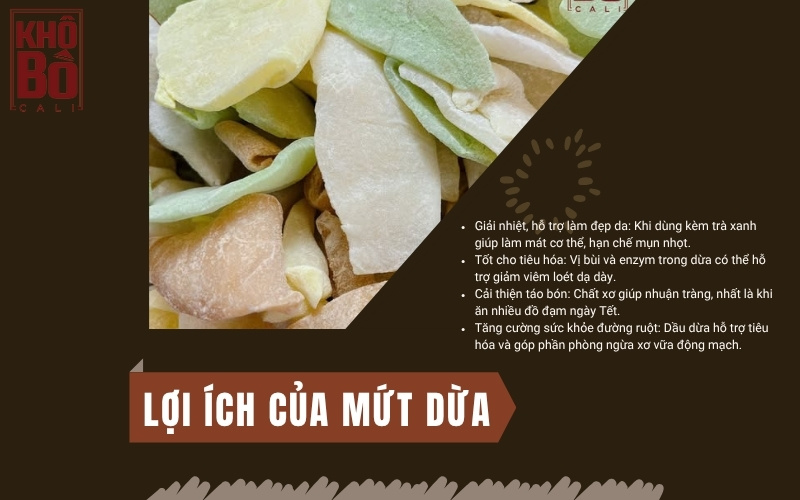
Lợi ích của mứt dừa

Mứt dừa được chế biến từ cùi dừa tươi nên mang trọn vị ngọt thơm, béo bùi đặc trưng. Trong món ăn này còn chứa nhiều dưỡng chất có lợi như protein, vitamin, axit hữu cơ và các khoáng chất chống oxy hóa. Nhờ đó mứt dừa góp phần hỗ trợ thanh lọc cơ thể, bảo vệ tế bào và tốt cho chức năng gan.

Dù giàu chất béo và năng lượng nhưng mứt dừa lại không chứa quá nhiều tinh bột hay protein. Trung bình 100g mứt dừa cung cấp khoảng 500 calo, phù hợp để tiếp thêm năng lượng trong những ngày đầu năm se lạnh.

Mứt dừa sấy khô còn mang lại một số công dụng đáng chú ý như:

• Giải nhiệt, hỗ trợ làm đẹp da: Khi dùng kèm trà xanh giúp làm mát cơ thể, hạn chế mụn nhọt.
• Tốt cho tiêu hóa: Vị bùi và enzym trong dừa có thể hỗ trợ giảm viêm loét dạ dày.
• Cải thiện táo bón: Chất xơ giúp nhuận tràng, nhất là khi ăn nhiều đồ đạm ngày Tết.
• Tăng cường sức khỏe đường ruột: Dầu dừa hỗ trợ tiêu hóa và góp phần phòng ngừa xơ vữa động mạch.

Bạn có thể chọn làm mứt dừa từ dừa non hoặc dừa già tùy khẩu vị. Ngay sau đây là hai cách làm mứt dừa phổ biến và dễ thực hiện tại nhà.

Công thức làm mứt dừa ngon tại nhà

Bạn có thể lựa chọn làm mứt dừa non dẻo hoặc mứt dừa truyền thống từ dừa già. Dưới đây là hướng dẫn chi tiết cách làm mứt dừa non.

Nguyên liệu cần chuẩn bị

  • 700 g cơm dừa non

  • 350 g đường

  • 1⁄2 quả chanh

  • 1 ống vani

  • 1⁄2 muỗng cà phê muối

  • Màu thực phẩm hoặc nước ép rau củ tùy thích

mứt dừa

Cách thực hiện

Bước 1. Chọn và sơ chế dừa
Ưu tiên những trái dừa có cùi mềm, trắng tươi và nhiều sữa. Cạo bỏ lớp vỏ nâu, rửa sạch rồi cắt dừa theo chiều dọc dày khoảng 0.6 cm để giữ độ dẻo. Rửa lại 2 đến 3 lần cho sạch dầu.

Bước 2. Làm trắng và khử dầu dừa
Vắt chanh vào thau nước rồi cho dừa vào rửa để giúp dừa trắng hơn. Ngâm dừa trong nước sôi khoảng 3 phút để loại bớt dầu rồi vớt ra để ráo.

Từ đây bạn có thể làm theo hai kiểu: mứt dừa truyền thống hoặc mứt dừa nhiều màu.

Mứt dừa truyền thống

Bước 3. Ướp dừa
Cho dừa vào thau, thêm muối và đường trộn đều. Ướp từ 2 đến 3 giờ để đường thấm hoàn toàn.

Bước 4. Sên dừa
Đổ dừa vào chảo, bật lửa lớn đến khi nước đường sôi thì hạ lửa nhỏ. Sên đều tay đến khi gần cạn nước thì cho vani vào tạo hương thơm. Tiếp tục sên đến khi đường kết tinh thành lớp phấn trắng bám quanh miếng dừa là hoàn thành.

Mứt dừa nhiều màu

Bước 3. Tạo màu cho dừa
Sau khi trộn muối và đường, chia dừa thành nhiều phần. Pha màu thực phẩm hoặc nước ép rau củ như lá dứa, củ dền, cà rốt vào từng phần rồi ướp 2 đến 3 giờ cho dừa ngấm màu.

Bước 4. Sên từng phần
Lần lượt cho từng màu vào chảo riêng để sên tương tự như cách làm truyền thống. Khi đường khô và lên phấn đẹp mắt thì cho ra khay, tiếp tục làm với phần còn lại.

Thành phẩm

Mứt dừa đạt chuẩn sẽ có độ dẻo vừa phải, thơm béo đặc trưng và vị ngọt hài hòa. Những sắc màu bắt mắt cũng khiến khay mứt ngày Tết thêm rộn ràng và hấp dẫn trẻ nhỏ. Khi nguội hoàn toàn, bảo quản mứt trong hũ thủy tinh kín để giữ được lâu mà vẫn trọn hương vị.

Cách làm mứt dừa già giòn thơm

Nguyên liệu cần có

  • 700 g cơm dừa già

  • 350 g đường

  • 1⁄2 quả chanh

  • 1 ống vani

  • 1⁄2 muỗng cà phê muối

mứt dừa

Các bước thực hiện

Bước 1. Chọn và sơ chế dừa
Ưu tiên chọn những trái dừa không quá già để miếng mứt có độ giòn vừa phải, không bị cứng. Cạo bỏ lớp vỏ nâu, rửa sạch rồi cắt dừa thành từng sợi hoặc miếng dọc dày khoảng 0.2 đến 0.3 cm để khi sên không bị gãy và dễ thấm đường.

Bước 2. Khử dầu và làm trắng dừa
Giữ dừa trong thau nước có pha nước cốt 1⁄2 quả chanh khoảng 2 giờ giúp dừa trắng và bớt dầu. Rửa lại 2 đến 3 lần bằng nước sạch rồi để ráo.

Bước 3. Ướp đường
Cho dừa vào thau, thêm đường và muối, trộn đều rồi ướp từ 2 đến 3 giờ. Cứ 30 phút đảo nhẹ một lần để dừa thấm đường đều hơn.

Bước 4. Sên mứt
Cho dừa đã ướp vào chảo, bật lửa lớn đến khi đường tan và sôi, sau đó hạ nhỏ lửa. Sên đều tay đến khi đường gần cạn thì cho vani vào để tăng hương thơm. Tiếp tục sên đến khi miếng dừa khô lại và được bao phủ bởi lớp phấn đường trắng là hoàn tất.

Thành phẩm

Mứt dừa già khi hoàn thành sẽ có độ giòn nhẹ, vị ngọt vừa phải và hương thơm quyến rũ. Khi để nguội hoàn toàn, bạn chỉ cần cho vào hũ thủy tinh đậy kín để bảo quản. Mứt dừa già có ưu điểm giữ được lâu, rất thích hợp để chuẩn bị sẵn cho khay bánh mứt ngày Tết.

Với hai cách làm mứt dừa từ dừa non và dừa già như trên, bạn hoàn toàn có thể tự tay chuẩn bị những mẻ mứt thơm ngon, an toàn cho cả gia đình trong dịp Tết. Nếu muốn đổi vị, bạn cũng có thể sáng tạo thêm với hương vani, sữa tươi, cà phê hay màu sắc từ rau củ để khay mứt thêm phong phú và bắt mắt. Chỉ cần một chút thời gian và sự khéo léo, mứt dừa nhà làm sẽ đem lại trọn vẹn hương vị Tết và thêm ấm áp cho những ngày sum vầy. Chúc bạn thành công và có một mùa Tết thật ngọt ngào.

How to make crispy, fragrant lemongrass lime leaf chicken jerky at home, a snack you can’t stop munching on!

Lemongrass lime leaf chicken jerky has become a favorite snack, especially among young people. You don’t have to head out to enjoy it, just stay home and make your own batch that’s both delicious and safe to eat. Check out the simple recipe below!

Ingredients for Pan-Fried Chicken Jerky with Lime Leaves

  • 500g chicken breast

  • 3g lime leaves

  • 3 stalks lemongrass

  • 20g chili

  • 20g garlic and shallots

  • Seasonings: 4 tbsp fish sauce, 4 tbsp annatto oil, 1 tsp MSG, 1 tbsp sugar, chicken seasoning powder, chili powder, honey

Tip for choosing quality chicken breast:

Select pieces with a light pink color and firm, elastic texture. The meat should be odorless and free from excess moisture, which indicates freshness and good quality.

How to Make Chicken Jerky with Lime Leaves at Home (Pan Method)

Step 1: Prepare the ingredients

Lightly crush one stalk of lemongrass to boil with the chicken, and slice the remaining stalks thinly. Cut lime leaves into long, fine strips. Mince the garlic and three chili peppers.
In a pot of water, add the crushed lemongrass and shallots, season with 1 teaspoon of chicken powder, then bring to a boil. Add the chicken breast and simmer for about 30 minutes until cooked through.

Step 2: Shred the chicken

Once cooked, remove the chicken and dip it briefly in cold water for about 1 minute to firm up the texture. Tear the meat into small pieces, then gently pound them with the flat side of a knife to loosen the fibers. Continue shredding until you get thin strands of chicken.

Step 3: Make the sauce

In a small bowl, mix together 1 tbsp chili powder, 4 tsp fish sauce, 4 tsp annatto oil, 1 tsp MSG, 1 tsp sugar, 2 tsp chicken powder, and 2 tsp honey. Stir until all ingredients are well combined.

Step 4: Cook the chicken

Heat a pan over medium heat, add minced garlic and chili, and sauté until fragrant. Pour in the prepared sauce and about 2 cups of chicken broth. When the sauce starts boiling, add the shredded chicken and stir well so the meat absorbs the flavors. Continue stirring until the liquid is fully reduced, then add sliced lime leaves and chili. Toss everything together evenly, then turn off the heat.

Step 5: Finish and serve

Your homemade chicken jerky with lime leaves is ready! Super easy and quick, right? Spread the jerky on a tray and dry it in an oven or dehydrator for about 5 minutes. If you don’t have either, you can simply sun-dry it until it reaches your desired texture.

Time to Enjoy!

Your homemade chicken jerky with lime leaves is finally ready, beautifully golden, fragrant, and delightfully chewy. Each bite bursts with a perfect harmony of flavors: a hint of sweetness, a gentle spicy kick, and the refreshing citrus aroma of lime leaves that lingers on the palate.

It’s the kind of snack that makes you want to keep munching, delicious on its own or paired with an ice-cold drink. Imagine sitting back on a cozy weekend, chatting with friends or watching your favorite show while savoring this irresistible treat, pure satisfaction in every bite!

So what are you waiting for? Grab your pan and let’s make another batch, because once you start, it’s impossible to stop!

Simple and Effective Ways to Store Chicken Jerky with Lime Leaves

After making your delicious batch of chicken jerky, proper storage is key to keeping it flavorful and fresh for as long as possible. Here are a few easy methods to help you preserve that irresistible taste:

  • Store in airtight containers or ziplock bags:
    Once the jerky has cooled completely, place it in a jar with a tight-fitting lid or in ziplock bags. When you want to enjoy some, use a clean spoon to scoop out just the right amount, then seal it tightly again right away. This helps prevent moisture from softening the jerky.

  • Keep at room temperature for short-term use:
    If you plan to eat it soon, you can store the jerky at room temperature for about 2–4 days. Make sure it’s kept in a cool, dry place away from direct sunlight.

  • Refrigerate for longer freshness:
    For extended storage, place the jerky in the refrigerator. This method will keep it good for about 7–10 days while maintaining its flavor and texture.

  • Reheat if it gets slightly moist:
    If you notice the jerky becoming a bit soft or damp, simply toss it in a dry pan over low heat for a few minutes. This will help restore its crispness and aroma.

  • Vacuum-sealed option for long-term storage:
    For the best preservation, seal the jerky in vacuum bags before storing. With this method, your chicken jerky can last for more than two weeks while staying fresh, flavorful, and ready to enjoy anytime!

What do you think about this irresistible chicken jerky with lime leaves? At Khô bò CALI, we’re absolutely obsessed with it! With just a few simple ingredients, you can easily whip up a mouthwatering snack that’s fragrant, flavorful, and impossible to resist. So don’t wait any longer, roll up your sleeves, make a batch today, and share the joy with your family and friends!

How to Make Sweet and Chewy Soursop Jam at Home: Simple and Delicious Recipes

As the year draws to a close and spring approaches, the joyful atmosphere of Tet fills every corner. One thing that Vietnamese families can’t go without during this festive season is a plentiful tray of traditional sweets and preserves. Among them, soursop jam is considered an essential treat thanks to its delightful sweet-and-tart flavor, perfectly balancing the richness of other Tet delicacies. Although it may look sophisticated at first glance, making soursop jam is actually quite simple. Let’s join Khô bò CALI and get hands-on to prepare a delicious batch of jam to welcome the Lunar New Year!

How to Choose the Best Soursop for Making Jam

To achieve the perfect batch of soursop jam, the very first step starts with selecting high-quality fruit. Choosing the right soursop ensures a naturally delicious sweet-tart flavor and a pleasantly chewy texture after processing. Among different types, soursop (soursop/soursop custard apple) is the ideal choice, as it offers a refreshing balance of mild acidity and gentle sweetness.

When selecting fresh soursop, keep these tips in mind:

  • Look for fruits with smooth, shiny skin that still appear fresh and firm. The peel should be green with a slight yellowish tint, indicating that the fruit is ripening naturally.

  • Check the spines on the fruit, they should be large and spaced widely apart, a sign of good maturity and full pulp inside.

  • Pick soursops that are just perfectly ripe. Avoid overly soft or mushy fruits, as they will lose their chewy texture during the cooking process and may result in jam that appears cloudy or too mushy.

  • Gently press the fruit with your fingers, if it feels slightly soft yet still offers some firmness when tapped lightly, it’s in the best condition for making jam.

Soursop has two peak seasons each year. The first harvest typically falls around April to May, and the second one around October to November, these are the best times to get high-quality, flavorful fruits for your homemade Tet treats.

Traditional Soursop Jam (Candy-Style) Recipe

Ingredients

  • 1 kg soursop (soursop custard apple)

  • 300 – 400 g sugar (adjust to your preferred sweetness)

  • A pinch of salt (for preparation and seasoning)

  • Clear candy wrappers or cellophane for wrapping

Instructions

Step 1: Prepare the Soursop

Peel the soursop, remove the skin, and separate the flesh. Depending on your preference, you may remove the seeds completely although it’s optional. If you decide to keep the seeds, gently squeeze the fruit so the pulp separates into smaller segments.

Once the seeds are removed and the pulp is separated, lightly squeeze out some of the juice. This step helps reduce excess acidity and gives the jam a more pleasant balanced flavor. However, if you enjoy a tangier taste and a stronger soursop aroma, you can skip this step or only squeeze lightly, keeping more of the natural juices.

Step 2: Marinate with Sugar

Add approximately 1 teaspoon of salt and 400 g of sugar to the prepared soursop pulp. Mix well until the sugar is dissolved and evenly coats the fruit.

Cover the bowl with plastic wrap and let it rest overnight, allowing the soursop to absorb the sweetness thoroughly and develop a richer flavor.

Step 3: Cook the Soursop Jam

After marinating overnight, heat a non-stick pan over the stove a non-stick surface helps make the stirring process easier and prevents burning. You can use either a gas stove or an induction cooker.

Transfer the sugar-marinated soursop into the pan and turn the heat up until the mixture begins to boil. Then, reduce the heat to medium and continue stirring regularly. Over time, the mixture will gradually thicken, become clearer, and turn into a shiny golden hue.

Lower the heat to a gentle simmer and continue stirring occasionally to prevent it from sticking to the pan. Once the mixture becomes chewy and pulls together smoothly, turn off the heat.

Step 4: Sun-Dry and Shape

Allow the jam to cool slightly, then spread it evenly onto a tray lined with parchment paper. This prevents sticking and makes cleanup much easier.

Place the tray under direct sunlight for about 4 hours. Sun-drying helps the jam become firmer, clearer, and significantly improves its shelf life.

When the jam has dried and turned delightfully chewy, it’s time to wrap it! Roll small portions of the jam into candy shapes and wrap them tightly in cellophane. You can double-wrap each piece to maintain freshness longer.

After these simple steps, you’ll have delicious homemade soursop jam candies, delightfully sweet, pleasantly tangy, and completely hygienic. They make a wonderful treat for Tet or any festive occasion, bringing both flavor and the warmth of homemade love to your family.

Spicy Chili Salt Soursop Jam Recipe

Ingredients

  • 1 kg soursop (soursop custard apple)

  • 300–400 g sugar (adjust depending on your taste)

  • Salt (for cleaning and seasoning)

  • 1 tablespoon chili powder

  • Clear candy wrappers or cellophane for packaging

Instructions

Step 1: Prepare the Soursop

Peel the soursop carefully, separate the flesh, and remove the seeds. If you prefer, you may keep the seeds just lightly squeeze the pulp so the segments break apart more evenly.

Next, extract some of the excess juice. This helps balance the tartness while creating a firmer texture in the final product.

Step 2: Marinate with Sugar and Salt

Add 400 g sugar and about 2 teaspoons of salt to the prepared soursop pulp. Mix well until the sugar is evenly incorporated.

Cover the mixture and let it rest overnight. During this time, the fruit absorbs the seasoning, helping the flavors develop more fully while naturally thickening the pulp.

Step 3: Cook the Jam

Transfer the marinated soursop to a pan and cook over high heat until it begins to boil. Then lower the heat.

As the mixture starts to thicken, add the chili powder and stir continuously. Adjust the amount of chili to suit your family’s spice preference keep it mild for kids, or elevate the heat for those who love a punch of flavor.

Continue simmering over medium to low heat, stirring regularly to avoid burning. When the mixture becomes glossy, more transparent, and thick enough to hold together, turn off the heat.

Let it cool slightly, then spread the mixture onto a baking sheet or tray for the next step.

Step 4: Sun-dry and Finish

Place the tray under direct sunlight and dry for about 4 hours or until the jam becomes firm, slightly golden, shiny, and no longer sticky to the touch.

Once dried, bring the tray inside and shape the jam into small portions. Wrap each piece in cellophane like a small candy to preserve freshness.

Helpful Tips for Making Soursop Jam

Chewy Soursop

To ensure your homemade soursop jam turns out beautifully and stays fresh longer, here are some important tips to keep in mind:

  • Double wrapping for better preservation: Wrap each candy with two layers of cellophane the first layer directly around the jam and a second layer on the outside. This helps keep the candies fresh, reduces moisture exposure, and improves their shelf life.

  • Remove excess juice for a clearer finish: If you want your jam to have a glossy, transparent appearance, remember to squeeze out some of the natural liquid from the soursop during the preparation stage. This prevents the final product from appearing too cloudy.

  • Ideal sugar-marination time: The fruit shouldn’t be marinated too quickly or for too long. Typically, 4 to 8 hours allows the flavors to fully penetrate while maintaining the right texture.

  • Control the heat when cooking: Always keep an eye on the heat level and stir continuously while simmering. Reducing the heat at the right time prevents burning, which can cause the jam to darken too much or develop a bitter taste.

  • Flexible sun-drying time: The drying duration depends on sunlight intensity and your family’s preference for firmness. If the weather isn’t sunny enough, you can replace sun-drying with oven-drying at 90°C (around 194°F) for 2–3 hours, checking frequently to achieve your desired texture and color.

  • Consume within a reasonable time: Since this homemade candy contains no preservatives, storage time may vary based on how thoroughly it has been dried and how well it is protected from humidity while drying and storing.

Final Thoughts

Of course, you can always find soursop jam readily available at markets or specialty stores, especially during Tet. However, making it yourself at home offers a chance to “switch things up,” enjoy a fun cooking experience, and create a treat that is both delicious and safe for your family’s health. Plus it’s a wonderful way to show off your kitchen skills!

If you ever get tired of the traditional sweet version, try making the spicy chili-salt variation for an exciting blend of sweet, sour, salty, and mildly spicy flavors that everyone can enjoy.

Wishing you great success and joyful moments in your kitchen!

2 ways to make sweet and sour tamarind jam at home, once you try it, you’ll be addicted!

The weekend is here, and there’s nothing better than gathering with your family to enjoy some homemade snacks made with love. If you’re wondering what treat to prepare that’s both delicious and easy to make, sweet and sour tamarind jam is the perfect choice. Its tangy flavor, gentle sweetness, and a hint of spiciness create an irresistible combination that delights every taste bud. Today, let’s join Khô bò CALI in the kitchen to discover two super-easy and tasty ways to make sweet and sour tamarind jam, one bite, and you’ll be hooked!

Spicy Tamarind Jam

Ingredients (for about 600g of spicy tamarind jam):

  • 1 kg fresh tamarind

  • 30 g salt

  • 5 g ground chili (adjust to your taste)

  • 500 g sugar

Tools you’ll need:

A large pan, a mixing bowl, a knife, a spoon or chopsticks, a plate, plastic wrap, and an airtight food container for storage.

This version of tamarind jam is perfect for those who love a little heat in their snacks. The natural tanginess of tamarind blends beautifully with sugar and chili, creating a spicy-sweet treat that’s hard to resist. Prepare your tools and ingredients, and let’s start making this deliciously addictive spicy tamarind jam!

How to Make Spicy Tamarind Jam

Step 1: Prepare the Fresh Tamarind

Start by washing 1 kg of fresh tamarind thoroughly, then drain well. Place the tamarind in a zip-lock bag or an airtight food container and freeze it overnight.

Once frozen, remove the tamarind and let it thaw for about 2 hours. Carefully peel off the outer shells using a knife. Prepare a large bowl with 1 liter of water and 1 tablespoon of salt, stirring until the salt is dissolved. Soak the peeled tamarind in this brine for about 1 hour to reduce the sourness.

Next, make a small slit along the side of each tamarind pod and remove all the seeds. Return the seedless tamarind to the saltwater. After that, rinse the tamarind with clean water 4–5 times until the taste is less salty and sour, then drain it completely.

Step 2: Marinate the Tamarind

Place the prepared tamarind in a large mixing bowl. Add 500 g of sugar and mix gently until evenly coated. Cover the bowl tightly with plastic wrap and let the tamarind marinate for about 6 hours. This allows the sugar to dissolve and soak into each piece, giving the tamarind its signature chewy sweetness.

Step 3: Cook the Jam

After marinating, transfer the tamarind syrup (the melted sugar from marinating) to a pan and bring it to a boil over high heat. Once it starts boiling, reduce the heat to low and simmer until the syrup thickens slightly and turns a light golden brown.

Now, add the marinated tamarind into the pan and stir continuously for about 10 minutes, allowing the tamarind to absorb the sweet syrup completely. Next, add 1 teaspoon of ground chili and 1 teaspoon of salt, then stir well for another 5 minutes until evenly combined. Turn off the heat.

Step 4: Dry and Finish

Remove the tamarind pieces and arrange them neatly on a rack placed over a tray. Sun-dry for about 3–4 hours until the tamarind becomes drier and chewier. Once done, bring them inside and arrange beautifully on a plate, ready to enjoy!

Final Result

Your spicy tamarind jam is now ready to serve! Each piece is soft, glossy, and bursting with balanced flavors, a perfect harmony of sweet, sour, salty, and spicy. This delightful homemade treat will surely become a family favorite and a must-have snack for every weekend gathering!

Soft and Chewy Tamarind Jam

Ingredients (makes about 300g of chewy tamarind jam):

  • 500 g fresh tamarind

  • 400 g sugar

  • 2 tablespoons rock salt

Tools you’ll need:
A large pan, a mixing bowl, a knife, chopsticks or a spoon, plastic wrap, and a few clean bowls for soaking and mixing.

This version of tamarind jam has a softer, chewier texture and a milder flavor compared to the spicy one. The gentle balance of sweetness and tanginess makes it perfect for those who prefer a more subtle taste. With just a few simple ingredients and some patience, you can create a batch of homemade tamarind jam that’s glossy, dẻo (elastic and sticky), and simply irresistible.

Get your tools ready, roll up your sleeves, and let’s move on to the step-by-step guide to making this deliciously chewy tamarind jam at home!

How to Make Soft and Chewy Tamarind Jam

Step 1: Prepare the Fresh Tamarind

Start by rinsing 500 g of fresh tamarind thoroughly in a bowl of clean water to remove any dirt or residue. Place the tamarind in a zip-lock or plastic bag, then freeze it overnight.

When ready to use, take the tamarind out and let it thaw for about 1 hour. In another bowl, prepare 1 liter of water mixed with 2 tablespoons of rock salt. Carefully peel off the tamarind shells, making sure not to break the flesh, and soak the peeled tamarind in the saltwater overnight.

The next day, replace the water with fresh cold water and rinse the tamarind lightly. Using the tip of a knife, make a small slit along the side of each pod and gently remove all the seeds. Then soak the seedless tamarind in cold water for another 1 hour, changing the water every 15 minutes to reduce the saltiness and acidity.

Step 2: Marinate the Tamarind

Drain the tamarind well and transfer it to a clean mixing bowl. Add 400 g of white sugar and mix thoroughly so that each piece is evenly coated. Cover the bowl tightly with plastic wrap and let the tamarind marinate for 6 hours. During this time, the sugar will dissolve, forming a sweet syrup that gives the tamarind its signature chewy texture.

Step 3: Cook the Jam

Place the marinated tamarind and the syrup into a large pan. Cook over high heat until the mixture begins to bubble and thicken, then lower the heat to a gentle simmer. Stir continuously to prevent burning and ensure the tamarind absorbs the syrup evenly.

Once the mixture turns slightly sticky and the tamarind takes on a beautiful light brown color, turn off the heat.

Arrange the cooked tamarind pieces on a drying rack placed over a tray, then dry them in an oven at 50°C (122°F) for about 1 hour, or until the tamarind becomes slightly firm and glossy.

Final Result

Your soft and chewy tamarind jam is now ready to enjoy! Each piece is fragrant, translucent, and irresistibly chewy, perfectly balancing sweet and tangy flavors in every bite. It’s a delightful homemade treat that will keep everyone reaching for more!

With just two simple methods, you can easily make delicious jars of sweet and sour tamarind jam right at home, soft, fragrant, and delightfully spicy. Gather your family and enjoy the perfect balance of tangy, sweet, and mildly hot flavors during your cozy weekend get-togethers. Khô bò CALI wishes you great success, and don’t forget to share this tasty homemade treat with your loved ones to spread the sweet joy of togetherness!

10 Delicious Soft Coconut Candies You Can Easily Make at Home for Lunar New Year

Soft coconut candy is a traditional treat that appears every Lunar New Year, bringing families together to enjoy sweet moments while chatting in warmth and joy. If you are worried about the safety of store-bought coconut candy, why not make your own at home for everyone to enjoy. Let’s explore a variety of delicious coconut candy recipes to help you welcome a cozy and joyful Lunar New Year.

Soft Young Coconut Candy

Young coconut candy is a popular Lunar New Year treat. You can easily make it at home with just a few ingredients such as young coconut meat, sugar, and vanilla. The finished candy has a mildly sweet and nutty taste with a pleasant crunch. It pairs nicely with a cup of warm tea for friendly chats with family and friends.

To make this candy delicious, choose young coconut and slice it into long thin strips. Wash several times to remove excess coconut oil. Then soak the coconut with sugar for about 1 to 2 hours until the sugar dissolves. Cook in a large pan, starting on high heat then gradually lowering to medium heat until the candy becomes dry and lightly coated with a fine white sugar layer. You can store it in jars or zip bags for 3 to 4 weeks.

Turmeric Yellow Coconut Candy

If plain white coconut candy feels too simple, you can add natural coloring to make it more vibrant. Turmeric is a healthy choice because it creates a striking yellow color and contains curcumin, known for its antioxidant and anti-inflammatory properties.

The method is almost the same as the traditional version. After preparing the coconut strips, mix them with sugar and turmeric powder. Let them soak for about 2 hours. Then cook on low heat until the liquid evaporates and a fine sugary coating appears. The candy will have an appealing golden color with a pleasant and slightly different flavor.

Milk Coconut Candy

Regular coconut candy already tastes rich and sweet, yet many people enjoy adding milk during cooking for an even creamier and more aromatic result. Milk coconut candy melts softly in your mouth and has a delicious milky fragrance.

You only need coconut meat, sugar, and a bit of fresh milk or condensed milk. Once the coconut strips have soaked in sugar, cook them in a wide pan. When the syrup thickens, add the milk and continue stirring until the sugar crystallizes and the candy becomes dry. The result is a delightful, creamy version of this Tet favorite.

Gac Coconut Candy

Similar to how gac fruit is used to create colorful sticky rice, it can also give coconut candy a beautiful orange-red hue. The flavor remains rich and coconutty, with a gentle aroma from the gac that makes the candy both eye-catching and unique.

Cut the gac fruit, remove the seeds, and mix the fleshy part with the prepared coconut strips. Add sugar and let everything marinate for 2 to 3 hours. Cook the mixture over high heat at first, then gradually lower it for 40 to 50 minutes until the candy becomes dry and naturally colored. The subtle gac scent will make this version truly special.

Rose-Shaped Coconut Candy

Guests will be impressed with a plate of rose-shaped coconut candies. It requires patience and attention to detail, yet the final presentation makes the effort worthwhile.

After peeling and slicing the coconut into thin strips, blanch it in boiling water and rinse thoroughly to reduce the oil. Soak the strips with sugar and natural colors, then cook until the coconut becomes firm and coated with crystallized sugar. While still warm, roll each strip into a spiral shape to form a rose, holding it tightly so the shape stays in place. This creative version transforms plain coconut candy into a charming and festive treat.

Coconut Candy Bites

If you are familiar with the traditional long coconut strips, try switching things up with round coconut candy bites. These colorful little treats look like tiny sugar-coated candies, offering a sweet aroma and delightful flavor.

To make them, prepare coconut meat, sugar, and natural coloring ingredients such as pandan leaves, milk, coffee, passion fruit, or gac fruit. Cut the coconut into small cubes about 1 cm. Rinse them in warm water until the liquid runs clear. Then boil briefly, soak in sugar syrup, and cook until dry just like the regular method. The result is vibrant, bite-sized treats that kids and adults love.

Coffee Coconut Candy

This version only requires coconut meat, sugar, and coffee. Slice the coconut into thin strips, marinate with coffee and sugar, then cook until the coconut dries and the sugar forms a light coating. Simple and quick to prepare.

Coffee coconut candy has a gentle coffee aroma blended with the chewy coconut texture and a hint of vanilla. The strips turn a beautiful golden brown with a balanced sweetness and no bitterness. It is hard to stop at just one piece. Go ahead and give it a try in your own kitchen.

Colorful Coconut Candy

This multicolored version looks complicated but is actually quite simple. You prepare the coconut just like the basic recipe, then divide it into small batches and color each with natural powders such as matcha or turmeric. Soak, cook, and you’re done.

The finished candies feature a variety of cheerful colors. Each strip is elastic and not overly sweet. If you want a Tet candy tray that stands out with multiple flavors and colors, this is a great choice. It is a festive favorite that your whole family will enjoy.

Chrysanthemum Coconut Candy

To create these chrysanthemum-shaped treats, you will need coconut meat, sugar, and a natural coloring ingredient such as gardenia seeds or other plant-based powders. After slicing, coloring, and coating the coconut with sugar during cooking, shaping the strips into flowers requires a bit of creativity and a steady hand.

The finished candies resemble vibrant little blossoms, each boasting a sweet fragrant taste with a pleasant chewiness. Their charming appearance is sure to draw admiration from guests during the holiday.

Pandan Coconut Candy

This version uses pandan leaves to give the coconut candy a distinct green color and an irresistible aroma. Slice the coconut into strips, soak with pandan extract, then cook with sugar until dry.

The result is chewy, creamy strips infused with the fresh scent of pandan. The bright green color stands out beautifully on any Tet candy tray. With just a few easy steps, you can prepare a delightful and refreshing treat for the celebration.

Tips for Making and Storing Coconut Candy

The storage method used for coconut candy can also be applied to many other types of Tet treats such as ginger candy or winter melon candy. To keep your coconut candy fresh for as long as possible, store it in airtight containers or sealed plastic bags. Glass jars with tight lids are highly recommended.

A helpful trick is to sprinkle a thin layer of sugar at the bottom of the jar before adding the candy. This extra sugar absorbs moisture and helps maintain the candy’s perfect texture.

If you notice the candy becoming slightly sticky or watery, do not rush to throw it away. Simply reheat it in a pan over low heat, stir until dry again, then let it cool before storing. It will still be delicious and ready to enjoy.

Khô bò CALI has gathered all these delightful coconut candy recipes so you can prepare tasty homemade treats for a warm and joyful Tet celebration with family and loved ones. Choose the recipe you love most and start cooking today for a sweeter holiday season.

Bật mí cách làm chà bông gà tơi mịn, thơm ngon chuẩn vị tại nhà ai ăn cũng mê

Chà bông luôn là món ăn “quốc dân” khiến ai cũng yêu thích bởi hương vị đậm đà và dễ kết hợp trong bữa ăn hằng ngày. Thay vì lựa chọn chà bông heo quen thuộc, bạn hoàn toàn có thể đổi vị với chà bông gà vừa thơm ngon vừa tốt cho sức khỏe. Nếu bạn đang tìm cách làm chà bông gà tơi mịn, hấp dẫn và đơn giản ngay tại nhà thì đừng bỏ qua bài viết này. Hãy cùng khám phá bí quyết để có ngay món chà bông gà cực tiện lợi, đảm bảo cả nhà đều mê tít.

Nguyên liệu cần chuẩn bị để thực hiện cách làm chà bông gà ngon tại nhà

cách làm chà bông gà

Để tạo nên món chà bông gà tơi mịn, đậm vị và giữ trọn dưỡng chất, bạn cần lựa chọn đầy đủ các nguyên liệu tươi ngon sau đây:

  • Ức gà 400g: Nên chọn phần ức gà tươi, ít mỡ, thịt săn chắc để sợi chà bông được khô và đẹp mắt.

  • Hành tím 3 củ: Tăng hương thơm tự nhiên, giúp món ăn dậy mùi hấp dẫn hơn.

  • Tỏi 3 tép: Hỗ trợ khử mùi và tạo vị thơm lừng đặc trưng.

  • Gia vị cơ bản: Nước mắm ngon, đường trắng, tiêu xay, hạt nêm và một ít bột ngọt để cân bằng vị mặn ngọt hài hòa.

Chuẩn bị đầy đủ nguyên liệu là bước đầu tiên quan trọng để đảm bảo cách làm chà bông gà đạt được thành phẩm thơm ngon, chuẩn vị và ai cũng yêu thích.

Cách làm chà bông gà tơi mịn đơn giản tại nhà

Bước 1: Sơ chế thịt gà và các nguyên liệu đi kèm

cách làm chà bông gà

Trước hết, bạn rửa sạch phần ức gà với nước muối pha loãng để khử mùi và chất bẩn bám trên bề mặt. Sau đó để ráo nước rồi cắt theo thớ dọc thành từng miếng dài khoảng 2–3 cm để khi giã hoặc xé, sợi chà bông được đẹp và đều hơn.
Hành tím và tỏi bóc vỏ, rửa sạch rồi băm thật nhuyễn để tăng hương thơm khi ướp và chế biến.

Bước 2: Ướp thịt gà cho thấm vị

cách làm chà bông gà

Cho thịt gà vào tô lớn và tiến hành ướp cùng 4 muỗng cà phê nước mắm, 1 muỗng cà phê đường, 1 muỗng cà phê hạt nêm, ½ muỗng cà phê tiêu xay, ½ muỗng cà phê bột ngọt, kèm theo hành và tỏi băm nhuyễn.
Trộn đều hỗn hợp rồi bọc kín bằng màng thực phẩm. Để thịt trong ngăn mát tủ lạnh tối thiểu 2 giờ hoặc qua đêm để gia vị thấm sâu vào từng thớ thịt, giúp món chà bông thêm đậm đà.

Bước 3: Rim thịt gà và làm chín

cách làm chà bông gà

Chuẩn bị một chiếc chảo chống dính, cho toàn bộ phần thịt đã ướp vào và bật lửa vừa. Đảo đều tay cho đến khi thịt săn lại, sau đó đổ khoảng nửa chén nước vào và đậy nắp nấu trong khoảng 20 phút. Khi thịt đã chín mềm và cạn nước, bạn vớt thịt ra để nguội bớt.
Phần nước rim thịt nên lọc bỏ xác hành tỏi để dùng lại trong công đoạn xào giúp món chà bông đậm vị hơn.

Bước 4: Xé hoặc giã nhỏ và xào khô thịt

cách làm chà bông gà

Cho thịt gà đã chín vào cối, giã đến khi thịt tơi thành sợi. Nếu miếng nào còn to có thể dùng tay xé nhỏ cho đều.
Bắc lại chảo lên bếp, cho phần thịt gà đã giã vào và xào với lửa nhỏ. Trong quá trình xào, cứ 3–4 phút bạn rưới thêm một chút nước rim thịt đã lọc để sợi chà bông mềm, dậy vị và không bị khô cứng. Xào liên tục khoảng 20 phút cho đến khi chà bông tơi, khô và có màu vàng nhạt đẹp mắt thì tắt bếp.

Bước 5: Hoàn thành và bảo quản

cách làm chà bông gà

Món chà bông gà thành phẩm có hương thơm hấp dẫn, thớ thịt tơi mềm, vị đậm đà rất đưa cơm hoặc ăn kèm bánh mì, cháo đều tuyệt vời. Chà bông nguội hoàn toàn rồi cho vào hũ thủy tinh đậy kín để sử dụng dần. Nếu bảo quản trong ngăn mát tủ lạnh có thể dùng được trong nhiều ngày mà vẫn giữ trọn hương vị.

Cách bảo quản và thời gian sử dụng chà bông gà hiệu quả

Sau khi hoàn thành món chà bông gà thơm ngon, việc bảo quản đúng cách sẽ giúp sản phẩm luôn giữ được độ tươi ngon và kéo dài thời gian sử dụng. Trước hết, hãy để chà bông nguội hoàn toàn rồi cho vào hũ thủy tinh hoặc hộp đựng thực phẩm có nắp đậy kín. Đặt hộp ở nơi thoáng mát, khô ráo hoặc bảo quản trong ngăn mát tủ lạnh sẽ giúp chà bông giữ được chất lượng lâu hơn, tránh ẩm mốc và mất hương vị.

Trong quá trình sử dụng, bạn cần dùng muỗng hoặc đũa sạch để lấy chà bông. Việc tránh tiếp xúc trực tiếp của tay hoặc dụng cụ chưa vệ sinh kỹ sẽ hạn chế vi khuẩn xâm nhập và ngăn ngừa chà bông bị hư hỏng. Với cách bảo quản này, chà bông gà có thể dùng được từ 2 đến 3 tháng mà vẫn đảm bảo thơm ngon như lúc mới làm.

Chà bông gà rất linh hoạt trong việc chế biến món ăn. Bạn có thể dùng kèm với cơm trắng, cháo nóng, bánh mì, hay chế biến thành món cơm cháy chà bông hấp dẫn. Ngoài ra, đây cũng là món ăn vặt giàu protein, phù hợp cho trẻ nhỏ ăn dặm, người lớn bận rộn hoặc làm đồ ăn dự trữ khi đi xa. Chỉ cần áp dụng đúng phương pháp bảo quản thì bạn luôn có sẵn một món ăn tiện lợi và bổ dưỡng cho mọi thành viên trong gia đình.

Như vậy, cách làm chà bông gà tại nhà thật sự không hề phức tạp, chỉ cần một chút khéo léo và kiên nhẫn là bạn đã có ngay món ruốc gà tơi mịn, thơm nức mũi để thưởng thức mỗi ngày. Từng sợi chà bông vàng óng, đậm đà gia vị sẽ khiến cả gia đình bạn mê mẩn, đặc biệt khi dùng kèm cơm nóng, bánh mì hoặc cháo trắng đều vô cùng hấp dẫn. Hãy lưu lại công thức này và bắt tay vào thực hiện ngay hôm nay để bữa ăn trở nên tiện lợi mà vẫn đầy đủ dinh dưỡng. Chúc bạn thành công và có những phút giây vào bếp thật vui vẻ cùng món chà bông gà chuẩn vị homemade.

2 simple methods on How to make grapefruit peel jam that are soft, fragrant, perfectly flavorful, and not bitter

Grapefruit peel, often overlooked and discarded during daily food preparation, actually holds a unique culinary charm and impressive health benefits. Transforming this fragrant peel into a delicious and refreshing jam not only brings a delightful treat to your holiday dessert table but also supports your well-being through its rich fiber and antioxidant content. If you are searching for a creative way to enjoy grapefruit, while still maintaining a healthy lifestyle and even supporting weight management, then learning How to make grapefruit peel jam is the perfect choice. Let this simple yet rewarding recipe elevate your homemade sweets and give you a new perspective on this wonderfully versatile fruit.

How to make grapefruit peel jam

To begin the process of How to make grapefruit peel jam, you will need a few simple yet essential ingredients that ensure both delicious flavor and the right texture. Prepare about 500 grams of fresh grapefruit peel, carefully selected from ripe and fragrant grapefruits. For sweetness and balance, use 300 grams of white granulated sugar. Additionally, a small amount of salt is necessary to help remove bitterness from the peel. Finally, include one bowl of lime water (alkaline water), which plays an important role in keeping the peel firm, chewy, and shiny after cooking. With these ingredients ready, you are already halfway to creating a delightful and healthy homemade jam.

Step 1: Prepare the grapefruit peel

How to make grapefruit peel jam

Begin by trimming away the excessively thick white pith from the peel to avoid overwhelming bitterness. Rinse the peel thoroughly under running water, then cut it into thin, bite-sized strips. Those who prefer a more vibrant green color in their jam may use young grapefruit peel for a fresher appearance.
Place the prepared peel into a bowl, sprinkle one teaspoon of salt over it, and gently massage for a few minutes. Rinse several times with clean water. This process helps reduce bitterness and softens the peel.
Next, soak the peel in lime water for approximately four hours. After soaking, remove the peel and wash it repeatedly until all lime water residue is gone.

Step 2: Boil the peel

How to make grapefruit peel jam

Bring a pot of water to a boil and add one teaspoon of salt. Once the water is boiling, put in the grapefruit peel and cook for about three minutes. Remove the peel, discard the water, and refill the pot with fresh water to repeat the boiling process. Perform this step two to three times to eliminate any remaining bitterness.
After boiling, soak the peel in a bowl of cold water for five minutes, then gently squeeze out the excess water.

Step 3: Marinate with sugar

How to make grapefruit peel jam

Transfer the peel to a large bowl, add 300 grams of sugar, and mix well. Allow it to marinate for about four hours until the sugar fully penetrates the peel and creates a syrupy mixture.

Step 4: Cook the jam

How to make grapefruit peel jam

Place the peel and the sugar syrup into a pot and heat over medium heat. Stir occasionally to prevent sticking. As the syrup reduces, lower the heat and continue stirring continuously until the jam becomes completely dry and the sugar coats the peel evenly.
Continue tossing for a few additional minutes off the heat to ensure the jam dries fully. Allow it to cool completely before storing in airtight jars or zip-lock bags.

Step 5: Final product

How to make grapefruit peel jam

The finished grapefruit peel jam will have a beautiful orange-gold color with a delicate sugar coating. Each piece delivers a satisfying crispness and a distinctive, refreshing citrus aroma that makes it an irresistible treat for festive and everyday enjoyment.

How to make grapefruit peel jam without traditional pan-stirring

For those seeking a quicker and more convenient approach to preparing homemade jam, this no-stir method delivers delicious results while saving considerable time and effort in the kitchen. The natural fragrance of grapefruit peel remains intact, and the texture becomes beautifully chewy without the need for continuous cooking over heat.

To begin, prepare one fresh grapefruit with a firm peel, ideally from a fragrant, ripe fruit to ensure the best aroma. For sweetness and proper preservation, use 1 kilogram of granulated sugar, which will help draw out moisture from the peel and gradually form a glossy syrup coating. Additionally, a small amount of coarse salt plays an essential role in reducing bitterness and cleansing the peel thoroughly before processing.

With these simple ingredients gathered, you are ready to explore a more effortless and enjoyable way to create this delightful citrus treat.

Step 1: Prepare the grapefruit peel

How to make grapefruit peel jam

Begin by peeling the grapefruit and carefully removing the thick spongy pith from the inside of the peel. Slice the peel into thin, even strips to ensure a pleasant texture when enjoyed later. Place the peel into a bowl and rinse it with salted water three to four times. This process helps eliminate the sharp, tingling bitterness naturally present in grapefruit skin.
Next, boil the peel in a pot of water until the inner pith turns translucent and the green outer layer appears brighter. Once this transformation occurs, drain the hot water and rinse the peel twice with cold water to stop the cooking process. Allow it to drain completely.

Step 2: Coat with sugar and sun-dry

How to make grapefruit peel jam

Transfer the prepared peel to a large bowl and coat it evenly with one kilogram of sugar. Let the mixture rest overnight so the peel can fully absorb the sweetness while releasing its natural moisture.
The next day, spread the peel in a single layer on a tray and place it under direct sunlight. Strong sunlight will gradually dry the peel while forming a glossy sugar coating. After about two sunny days, the jam will be ready to enjoy.

Step 3: Final product

How to make grapefruit peel jam

The finished grapefruit peel jam offers an enticing citrus aroma and a delightful combination of gentle sweetness and a crisp, chewy bite. Its refreshing flavor makes it a wonderful and unique treat, especially when served alongside a warm cup of tea for a relaxing and enjoyable snack experience.

With these detailed instructions on how to make grapefruit peel jam, creating a delightful homemade treat has never been easier. From selecting fresh ingredients to completing each simple step, you can enjoy a fragrant, healthy, and beautifully textured jam right in your own kitchen. This is not only a wonderful way to make use of every part of the fruit but also an opportunity to bring a touch of creativity into your cooking. Wishing you great success and many joyful moments sharing this delicious grapefruit peel jam with family and friends.

Here are 2 simple ways on how to dry persimmons using an air fryer and an oil-free oven

An air fryer and an oil-free oven can turn you into a true kitchen master with their versatile features. Today, let’s explore how to dry persimmons using the dehydrating function of these two appliances to create delicious, chewy dried persimmons you can enjoy anytime!

Making Chewy Dried Persimmons Using an Air Fryer

Ingredients (for 1 serving):

  • 2 kg firm persimmons

  • A pinch of salt

  • 500 ml white wine

how to dry persimmons

Tools:
Air fryer with drying/dehydrating mode, knife, cutting board, aluminum foil, food container or zip bag.

Step-by-step instructions on how to dry persimmons using an air fryer:

Step 1: Prepare the persimmons

To begin how to dry persimmons, rinse the fruits thoroughly, remove the stems, and peel off the skin.
Once peeled, immediately soak them in a bowl of lightly salted water to prevent browning and to remove any surface residue.

Step 2: Slice the persimmons

When learning how to dry persimmons, it’s important to remember that persimmons will naturally shrink during the drying process, so you only need to cut each fruit in half or into thick slices. Avoid cutting too thin, as the texture may become too dry and brittle.

how to dry persimmons

Step 3: Coat with white wine

Gently roll or brush each persimmon slice with white wine.
This step not only enhances the flavor but also helps prevent mold growth during drying and storage a useful tip in the how to dry persimmons process.

Step 4: Dry the persimmons

Line the air fryer tray with aluminum foil, arrange the persimmon slices evenly, and place them inside the air fryer.
Select the dehydrating function and set the temperature to 130°C (266°F) for about 6 hours.
You can adjust the time slightly depending on your air fryer model and how soft or chewy you want the final result to be.

Step 5: Store your chewy dried persimmons

Once the persimmons are beautifully dried and slightly glossy, let them cool completely.
Store them in airtight containers or zip-lock bags.
If you’re planning to keep them for a long time, sprinkle a bit of glutinous rice flour on top to absorb excess moisture and maintain their soft texture.

By following these steps on how to dry persimmons, you’ll create delicious, naturally sweet, and chewy dried persimmons perfect as a healthy snack or a thoughtful homemade treat.

How to dry persimmons using an air fryer:

Step 1: Prepare the persimmons

To begin how to dry persimmons, start by washing the persimmons thoroughly. Peel off the skin and remove the stems carefully.
Once peeled, soak the persimmons in lightly salted water for about 10–15 minutes. This step helps prevent the fruit from turning brown and reduces any lingering bitterness, ensuring your dried persimmons taste naturally sweet and pleasant.

Step 2: Slice the persimmons

When learning how to dry persimmons, slicing plays an important role in the final texture.
Cut the persimmons into thick slices, about 2–3 cm each. Thin slices will dry too quickly and become hard, while thicker ones will keep their signature chewy texture.

how to dry persimmons

Step 3: Dry the persimmons in the air fryer

Place the persimmon slices evenly in the air fryer basket. Make sure they don’t overlap so the heat can circulate evenly.
Set the temperature to 80°C (176°F) and dry for 30 minutes.
After 30 minutes, open the fryer, flip the slices over, and continue drying. Repeat this process 3 times for a total of about 1.5 hours until the persimmons become soft, shiny, and slightly caramelized.
This slow, gentle drying process is the key step in how to dry persimmons using an air fryer for the perfect texture and natural sweetness.

Step 4: Cool and store

Once dried, remove the persimmons and let them cool completely at room temperature.
Store them in airtight containers or zip-lock bags, then place them in the refrigerator to maintain their moisture and flavor. Proper storage is essential in the how to dry persimmons process to keep them chewy and delicious for weeks.

By following these simple yet effective steps on how to dry persimmons, you can enjoy homemade chewy dried persimmons with a naturally rich sweetness a healthy, flavorful snack that’s perfect for both everyday enjoyment and festive treats.

How to Choose the Best Persimmons and Tell the Difference Between Firm and Soft Ones

Lợi ích tuyệt vời của trái cây sấy dẻo mà bạn nên biết

Trong nhịp sống bận rộn ngày nay, trái cây sấy dẻo đã trở thành món ăn vặt được nhiều người ưa chuộng không chỉ bởi hương vị thơm ngon, dễ bảo quản mà còn vì giá trị dinh dưỡng đáng kinh ngạc. Từ những lát xoài vàng óng, chuối ngọt mềm đến dâu tây chua dịu, mỗi miếng trái cây sấy đều mang trong mình năng lượng tự nhiên và lợi ích tuyệt vời cho sức khỏe. Hãy cùng khám phá vì sao món ăn giản dị này lại được xem là “bí quyết lành mạnh” của nhiều người hiện đại nhé!

Trái cây sấy dẻo là gì? Cách phân biệt trái cây sấy dẻo và trái cây sấy khô

Ngày nay, bên cạnh việc thưởng thức trái cây tươi, nhiều người còn lựa chọn trái cây sấy như một giải pháp tiện lợi, thơm ngon và vẫn đảm bảo giá trị dinh dưỡng. Nhờ áp dụng các công nghệ hiện đại như sấy dẻo, sấy khô, sấy lạnh hoặc sấy thăng hoa, trái cây sau khi sấy không chỉ kéo dài thời gian bảo quản mà còn dễ dàng vận chuyển, mang theo khi đi học, đi làm hay du lịch.

Trong số đó, trái cây sấy dẻo là dòng sản phẩm được yêu thích nhất nhờ hương vị tự nhiên và độ dẻo mềm hấp dẫn. Trái cây tươi sau khi được rửa sạch, cắt lát sẽ được sấy ở nhiệt độ thấp để giảm lượng nước đến một mức nhất định, giúp thành phẩm giữ được màu sắc bắt mắt, vị ngọt thanh và độ dẻo đặc trưng. Chính sự kết hợp giữa vị tươi nguyên và cảm giác dẻo dai đã tạo nên sức hút khó cưỡng cho món ăn vặt này.

trái cây sấy dẻo

Ngược lại, trái cây sấy khô lại được sấy ở nhiệt độ cao hơn, loại bỏ gần như toàn bộ lượng nước bên trong. Vì vậy, sản phẩm thường có kết cấu giòn xốp, kích thước nhỏ hơn so với ban đầu. Một số loại trái cây phổ biến được chế biến theo cách này gồm nho khô, chuối sấy, mít sấy, mận sấy hay sung sấy.

So với các phương pháp sấy khác, trái cây sấy dẻo có nhiều ưu điểm nổi bật:

  • Không chiên qua dầu, giữ trọn hương vị tự nhiên và dinh dưỡng của trái cây.

  • Màu sắc tươi sáng, gần giống trái cây tươi ban đầu.

  • Hàm lượng đường tự nhiên vừa phải, phù hợp cho nhiều đối tượng, kể cả người ăn kiêng.

  • Độ mềm, dẻo và thơm nhẹ, dễ ăn, không gây ngấy.

  • Không bị chảy nước hay biến đổi chất lượng trong thời gian bảo quản dài.

  • Tiện lợi khi mang theo và sử dụng ở bất kỳ đâu.

Nhờ những ưu điểm này, trái cây sấy dẻo không chỉ là món ăn vặt lành mạnh mà còn là lựa chọn hoàn hảo để bổ sung năng lượng nhanh chóng cho những ai yêu thích lối sống xanh – sạch – khỏe.

Trái cây sấy dẻo có tốt không? Giá trị dinh dưỡng và lợi ích tuyệt vời cho sức khỏe

Nhiều người thường băn khoăn liệu trái cây sấy dẻo có thực sự tốt cho sức khỏe hay không. Thực tế, dù đã trải qua quá trình loại bỏ phần lớn lượng nước, trái cây sấy dẻo vẫn giữ nguyên gần như toàn bộ dưỡng chất có trong trái cây tươi. Nhờ công nghệ sấy hiện đại ở nhiệt độ thấp, các vitamin và khoáng chất được bảo toàn tối đa, mang đến giá trị dinh dưỡng ấn tượng.

Đặc biệt, trong trái cây sấy dẻo còn chứa hàm lượng chất xơ cao gấp khoảng 3–4 lần so với trái cây tươi, giúp hỗ trợ tiêu hóa, tạo cảm giác no lâu và kiểm soát cân nặng hiệu quả. Mỗi miếng trái cây sấy dẻo là sự kết hợp hài hòa giữa năng lượng tự nhiên và các dưỡng chất thiết yếu như protein, carbohydrate, chất béo, vitamin A, vitamin C, vitamin nhóm B, sắt, kali, natri và chất chống oxy hóa polyphenol.

trái cây sấy dẻo

Polyphenol là hợp chất có khả năng chống oxy hóa mạnh, góp phần giảm viêm, cải thiện hệ tiêu hóa và hỗ trợ bảo vệ tế bào khỏi tác động của gốc tự do, nguyên nhân gây lão hóa sớm và nhiều bệnh mãn tính.

Không chỉ là món ăn vặt tiện lợi, trái cây sấy dẻo còn mang đến nhiều lợi ích đáng giá cho sức khỏe nếu sử dụng đúng cách. Dưới đây là một số tác dụng nổi bật mà bạn không nên bỏ qua.

Lợi ích tuyệt vời của trái cây sấy dẻo đối với sức khỏe

trái cây sấy dẻo

Bổ sung năng lượng nhanh chóng cho cơ thể

Nhờ quá trình sấy dẻo giúp cô đặc lượng đường tự nhiên và dưỡng chất, chỉ một phần nhỏ trái cây sấy dẻo cũng có thể cung cấp nguồn năng lượng dồi dào. Đây là món ăn nhẹ lý tưởng cho những ai thường xuyên vận động, làm việc cường độ cao hoặc cần nạp năng lượng tức thì. Một vài lát xoài dẻo, chuối sấy hay mít dẻo sẽ giúp cơ thể bạn hồi phục nhanh và tỉnh táo hơn.

Hỗ trợ phòng ngừa bệnh tật và bảo vệ tế bào

Nhiều nghiên cứu cho thấy trái cây sấy dẻo chứa hàm lượng cao các hợp chất chống oxy hóa như phytonutrients, quercetin, fisetin, astragalin hay methyl gallate. Những hoạt chất này có khả năng trung hòa gốc tự do, ngăn ngừa quá trình lão hóa tế bào và giảm nguy cơ mắc các bệnh nguy hiểm như ung thư vú, ung thư ruột kết hay ung thư tuyến tiền liệt. Ăn trái cây sấy dẻo đúng cách chính là một thói quen nhỏ mang lại lợi ích lớn cho sức khỏe lâu dài.

Cải thiện hệ tiêu hóa hiệu quả

Với hàm lượng chất xơ cao gấp nhiều lần trái cây tươi, trái cây sấy dẻo giúp hệ tiêu hóa hoạt động trơn tru hơn, hỗ trợ quá trình hấp thu dinh dưỡng và ngăn ngừa táo bón. Đây là lựa chọn tuyệt vời cho những ai có chế độ ăn ít rau xanh hoặc thường xuyên gặp vấn đề về tiêu hóa.

Hỗ trợ kiểm soát cân nặng

Mặc dù chứa đường tự nhiên, trái cây sấy dẻo vẫn là món ăn vặt thân thiện cho người giảm cân. Vị ngọt thanh và độ dẻo mềm tự nhiên giúp bạn cảm thấy no nhanh hơn, từ đó hạn chế cảm giác thèm ăn và kiểm soát khẩu phần hiệu quả. Chỉ cần ăn một vài miếng nhỏ khi đói, bạn đã có thể “cắt cơn thèm đồ ngọt” mà không sợ tăng cân.

Tăng cường hệ miễn dịch

Giống như trái cây tươi, trái cây sấy dẻo vẫn giữ lại lượng vitamin C đáng kể, dưỡng chất quan trọng giúp tăng sức đề kháng, chống viêm và bảo vệ cơ thể khỏi các tác nhân gây bệnh. Sử dụng trái cây sấy dẻo thường xuyên, đặc biệt trong mùa lạnh hoặc khi cơ thể mệt mỏi, sẽ giúp bạn duy trì năng lượng và sức khỏe tốt hơn.

Cải thiện lưu thông máu

Trong trái cây sấy dẻo có chứa polyphenol, một chất chống oxy hóa giúp tăng cường lưu thông máu, hỗ trợ tim mạch và giảm nguy cơ xơ vữa động mạch. Việc bổ sung đều đặn món ăn vặt này sẽ mang lại lợi ích tích cực cho những người có vấn đề về tuần hoàn hoặc huyết áp.

Những điều cần biết khi sử dụng trái cây sấy dẻo để tốt cho sức khỏe

Không thể phủ nhận rằng trái cây sấy dẻo là món ăn vặt tiện lợi và bổ dưỡng, nhưng để phát huy tối đa giá trị dinh dưỡng và tránh những tác động không mong muốn, bạn nên lưu ý một số điều quan trọng dưới đây:

trái cây sấy dẻo

Ăn với lượng vừa phải

Trái cây sấy dẻo chứa hàm lượng calo và đường tự nhiên khá cao do đã được cô đặc sau quá trình sấy. Vì vậy, bạn chỉ nên ăn khoảng 25–30 gram mỗi ngày (tương đương 4–5 miếng nhỏ) để bổ sung năng lượng mà không lo tăng cân.

Không thay thế hoàn toàn trái cây tươi

trái cây sấy dẻo vẫn giữ được phần lớn dưỡng chất, nhưng hàm lượng nước và vitamin C thường ít hơn so với trái cây tươi. Do đó, bạn nên xem đây là món ăn bổ sung hoặc đồ ăn nhẹ khi bận rộn, thay vì thay thế hoàn toàn trái cây tươi trong thực đơn hàng ngày.

Uống đủ nước khi ăn

Vì chứa nhiều chất xơ hòa tan, nếu không uống đủ nước khi ăn trái cây sấy dẻo, bạn có thể gặp tình trạng đầy bụng hoặc táo bón nhẹ. Hãy kết hợp uống 1–2 ly nước sau khi ăn để hỗ trợ tiêu hóa và giúp cơ thể hấp thu tốt hơn.

Chia nhỏ khẩu phần trong ngày

Thay vì ăn nhiều trong một lần, hãy chia nhỏ khẩu phần trái cây sấy dẻo thành các bữa phụ. Cách này vừa giúp cơ thể hấp thu dưỡng chất tốt hơn, vừa hạn chế việc nạp quá nhiều đường cùng lúc.

Ưu tiên sản phẩm tự nhiên, không chất tẩy hay đường hóa học

Hãy lựa chọn trái cây sấy dẻo tự nhiên, không sử dụng phẩm màu, chất bảo quản hoặc ngâm đường quá nhiều. Những sản phẩm này không chỉ an toàn hơn mà còn giữ được hương vị và giá trị dinh dưỡng gốc của trái cây.

Ăn đa dạng nhiều loại trái cây sấy dẻo

Mỗi loại trái cây sấy đều mang lại một nhóm dưỡng chất riêng: chuối sấy cung cấp kali, xoài dẻo giàu vitamin A, dâu tây sấy nhiều chất chống oxy hóa,… Việc kết hợp nhiều loại trái cây sấy dẻo sẽ giúp cơ thể hấp thu dinh dưỡng cân bằng và toàn diện hơn.

Chọn mua tại địa chỉ uy tín

Chỉ nên mua trái cây sấy dẻo từ những thương hiệu hoặc cửa hàng có chứng nhận an toàn thực phẩm. Ngoài ra, hãy chú ý đến hạn sử dụng, bao bì kín và hướng dẫn bảo quản để đảm bảo chất lượng sản phẩm khi dùng.

Kết luận

Trái cây sấy dẻo là lựa chọn tuyệt vời cho những ai yêu thích món ăn vặt lành mạnh và tiện lợi. Khi được sử dụng đúng cách, món ăn này không chỉ giúp bạn bổ sung năng lượng nhanh chóng mà còn mang lại nhiều lợi ích cho sức khỏe. Hy vọng những lưu ý trên sẽ giúp bạn thưởng thức trái cây sấy dẻo an toàn, ngon miệng và hiệu quả nhất.

How to make dried jackfruit

If you’re looking for a delicious and healthy snack to enjoy with family or friends, dried jackfruit is a perfect choice! This crispy, golden treat not only satisfies your cravings but also makes a wonderful homemade gift for festive occasions like Lunar New Year. To help you create this tasty snack at home safely and affordably, here’s a detailed guide on how to make dried jackfruit easily and perfectly right in your own kitchen.

How to Make Dried Jackfruit Using Common Kitchen Appliances

Making Dried Jackfruit with an Oven

How to make dried jackfruit

Step 1: Prepare the Ingredients

To begin your journey of how to make dried jackfruit, gather the following:

  • Fresh jackfruit: 1 kg

  • Lemon: 1 piece

  • Cooking oil: a small amount

  • Seasonings: sugar and salt

  • Basic kitchen tools: bowl, knife, baking tray, parchment paper

Step 2: Pre-Treat the Jackfruit

Carefully cut the jackfruit, separate each pod, remove the seeds, and slice the pods into halves or quarters depending on size.
In a large bowl, mix 2 teaspoons of sugar, 1 teaspoon of salt, and 1 teaspoon of lemon juice into a bowl of clean water. Stir well until dissolved.
Soak the jackfruit pieces in this mixture for about 15 minutes to enhance the flavor and prevent discoloration. Then drain them thoroughly in a basket and let dry naturally.

Step 3: Drying the Jackfruit

Divide the jackfruit into 2–3 portions for even drying. Line your baking tray with parchment paper, then spread the jackfruit evenly on top.

  • First round: Preheat your oven to 130°C (266°F) and dry the jackfruit for about 1 hour. Take the tray out and flip the pieces gently with chopsticks or tongs.

  • Second round: Continue drying at 100°C (212°F) for another 30 minutes, or until the pieces reach the desired crispness.

Step 4: The Perfect Result

Once done, you’ll have beautifully golden-yellow jackfruit chips that are irresistibly fragrant and crunchy. Each bite bursts with the natural sweetness and aroma of ripe jackfruit, making it a delightful snack for any occasion.
Mastering how to make dried jackfruit at home not only gives you a tasty treat but also ensures it’s healthier and preservative-free, perfect for sharing with friends and family!

How to Make Dried Jackfruit Using an Air Fryer

How to make dried jackfruit

Step 1: Prepare the Ingredients

If you’re looking for a quick and convenient method of how to make dried jackfruit, using an air fryer is an excellent choice. Prepare the following ingredients:

  • Peeled jackfruit: 500g

  • Lemon: 3 pieces

  • Salt: a small amount

  • Tools: knife, air fryer, pot, basket, chopsticks, spoon, and parchment paper or aluminum foil.

Step 2: Pre-Treat the Jackfruit

Cut or tear the jackfruit into bite-sized pieces for easier drying.
Next, prepare a bowl of cold water and mix in 1 tablespoon of salt with 1 tablespoon of lemon juice. Stir well until the salt dissolves.
Place all the jackfruit pieces into this solution and soak for about 15 minutes. This simple step helps remove any sticky latex from the fruit and keeps the jackfruit pieces looking fresh and vibrant. After soaking, drain the jackfruit using a basket and let it dry completely before proceeding to the next step.

Step 3: Drying the Jackfruit in an Air Fryer

Divide the jackfruit into 2–3 small batches to ensure even drying. Line the air fryer basket with parchment paper or aluminum foil to prevent sticking.

  • First round: Set the air fryer temperature to 130°C (266°F) and dry for 25–30 minutes.

  • Second round: Open the basket, gently flip or stir the jackfruit to ensure even crisping. Lower the temperature to 100°C (212°F) and continue drying for another 30 minutes until the jackfruit becomes crispy and golden.

Step 4: Enjoy the Result

With this method of how to make dried jackfruit, your snack will be ready in no time! The air fryer not only saves time but also keeps the jackfruit’s natural sweetness and aroma intact. Each chip is light, crispy, and bursting with flavor, a perfect treat for both kids and adults.
Enjoy your homemade dried jackfruit as a healthy snack during work breaks, while watching movies, or as a special gift for your loved ones. Once you try it, you’ll definitely want to make more!

How to Make Crispy Dried Jackfruit in a Pan

How to make dried jackfruit

Step 1: Prepare the Ingredients

If you don’t have an oven or air fryer at home, don’t worry, you can still learn how to make dried jackfruit using just a simple pan. This method is easy to follow and produces irresistibly crunchy jackfruit chips. Prepare the following ingredients:

  • Fresh jackfruit: 700g

  • Fresh lemon: 2 pieces

  • Sugar: 150g

  • Salt: 1 teaspoon

  • Tools: knife, pan, large bowl, basket, and plate

Step 2: Pre-Treat the Jackfruit

First, remove the seeds from the jackfruit while keeping the golden fibrous strands around the pods, they add extra crispiness after drying.
Tear or slice the jackfruit into medium-sized pieces, just enough for one bite.
Next, prepare a large bowl of water and add 1 teaspoon of salt, 3 tablespoons of sugar, and the juice of 2 lemons. Stir until everything dissolves completely.
Soak the jackfruit in this mixture for 10–15 minutes to remove any stickiness and enhance the fruit’s natural flavor. After that, take the jackfruit out, gently squeeze out the excess water, and let it air dry.

Step 3: Pan-Drying the Jackfruit

Divide the jackfruit into 2–3 portions to make the drying process easier and more even.
Place a non-stick pan on the stove and heat it over medium heat. Once hot, lower the flame and add the first batch of jackfruit to the pan.
Stir gently for about 3 minutes until the surface becomes slightly drier. Then sprinkle in the remaining sugar and continue tossing the jackfruit continuously to prevent it from sticking or burning.
Keep stirring until the moisture completely evaporates and the jackfruit turns beautifully golden and crispy.

Step 4: The Perfect Result

With this simple how to make dried jackfruit method, you’ll get a batch of perfectly crisp, sweet, and fragrant jackfruit chips, all without needing any fancy kitchen equipment. The color of the finished product is a natural golden brown, the texture is crunchy but not brittle, and the flavor is rich with the signature sweetness of ripe jackfruit.
It’s a wonderful snack to enjoy while chatting with friends, watching TV, or serving guests during holidays. Once you’ve tried this homemade version, you’ll realize that making crispy dried jackfruit right in your own kitchen is not only fun but also incredibly rewarding!

Important Tips for Making Dried Jackfruit

How to Choose Fresh, High-Quality Jackfruit

For the best results when learning how to make dried jackfruit, selecting the right fruit is the first and most important step. Choose Thai jackfruit that is ripe enough to be golden yellow but not overly soft. Overripe jackfruit tends to lose its firmness and won’t stay crispy after drying.

How to make dried jackfruit
A perfectly ripe jackfruit has a naturally sweet aroma, slightly golden-brown skin, and thorns that are spaced far apart and no longer sharp. These are clear signs that the fruit is ready for use and will yield delicious, fragrant dried jackfruit chips.

Foolproof Tips for Perfect Dried Jackfruit

How to make dried jackfruit

To make your dried jackfruit a guaranteed success, here are some expert tips to follow:

  • Before cutting or separating the pods, lightly coat your hands with a thin layer of cooking oil or dip them into rice water. This helps prevent the sticky latex from clinging to your skin. You can also rub rice bran on your hands afterward to remove any remaining sap easily.

  • To clean your knife after cutting the jackfruit, place it in the freezer for a few minutes, or rub a bit of cooking oil (or kerosene) on the blade, then wash it thoroughly with soap and water.

  • Avoid slicing the jackfruit pieces too thin; they will shrink and crumble easily after drying.

  • When using an oven or air fryer, make sure not to layer the jackfruit too thickly on the tray, this ensures even airflow and crispiness.

  • If you’re pan-drying, use a cast-iron or thick-bottomed pan with deep sides, and always cook on low heat to prevent burning.

  • The ripeness level of the jackfruit will determine how long it takes to dry. Adjust the drying time and temperature based on your preferred texture, softer for chewy dried jackfruit or longer for extra crispness.

How to Store Dried Jackfruit for Long-Lasting Freshness

Once your dried jackfruit has cooled completely, store it properly to maintain its flavor and crispness. Place the chips in airtight containers such as zip-lock bags, sealed jars, or food storage boxes.
Keep them in a cool, dry place, away from direct sunlight or high humidity to prevent moisture buildup.
When stored correctly, your homemade dried jackfruit can stay delicious and crunchy for up to 5–6 months, making it a convenient and healthy snack that’s always ready to enjoy.

Where to Buy Delicious and High-Quality Dried Jackfruit

If you love the taste of crispy, fragrant jackfruit chips but don’t have time to make them yourself, don’t worry, you can still enjoy the perfect flavor with premium dried jackfruit from Khô Bò CALI.

Khô Bò CALI is known for offering naturally dried fruits that retain their original sweetness, aroma, and nutritional value, without preservatives or added coloring. Each slice of dried jackfruit is made from carefully selected ripe Thai jackfruit, processed under modern drying technology to achieve the ideal balance of crispiness, flavor, and freshness.

How to make dried jackfruit

Whether you want a healthy daily snack, a special treat for guests, or a thoughtful gift for your loved ones, Khô Bò CALI’s dried jackfruit is the perfect choice.

Why you’ll love Khô Bò CALI’s dried jackfruit:

  • 100% natural ingredients, no preservatives.

  • Sweet, aromatic, and perfectly crunchy in every bite.

  • Hygienically produced and beautifully packaged.

  • Long shelf life, convenient to enjoy anytime, anywhere.

👉 Order now at Khô Bò CALI to experience the delicious taste of premium dried jackfruit that’s both safe and satisfying. Once you try it, you’ll know why it’s a favorite among dried fruit lovers!

📞 Order now: +1 (714) 452-7679 / +1 (714) 234-6899
🌐 Shop online at: Khobocali.com