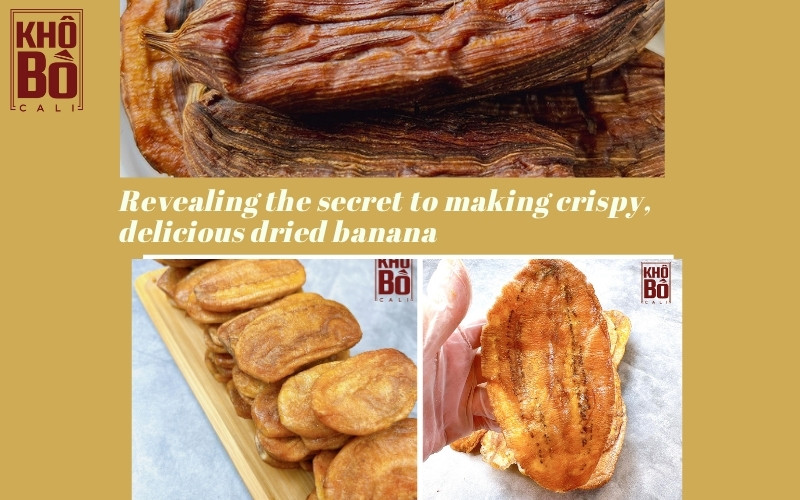
Sweet, fragrant, and delightfully chewy, dried banana is a treat everyone loves. Instead of just eating fresh bananas or baking with them, why not try making dried banana at home? It’s cleaner, tastier, and you’ll have full control over the quality. The process may seem tricky, but it’s actually super simple, let’s get started in the kitchen with Khô bò CALI!
How to Make Dried Banana at Home
Preparing the Ingredients

To make delicious dried banana, start by selecting:
-
1 ripe bunch of bananas It’s best to use a firm variety such as “chuối sứ.” Choose bananas that are just ripe but not overly soft; this helps the slices stay crispy and naturally sweet after drying.
-
1 fresh lemon
-
2 tubes of vanilla powder or a few drops of vanilla extract
Step-by-Step Instructions
Step 1: Prepping the Bananas
Peel the bananas and place them in a bowl.
Using a sharp knife, slice the bananas into thin pieces about 0.3 cm thick. You can cut them into round slices, diagonal pieces, or even lengthwise strips depending on the texture and look you prefer. Arrange the sliced bananas neatly on a plate to prepare for drying.

Step 2: Arranging the Banana Slices
Lay the banana slices gently on the trays of a fruit dehydrator, being careful not to press too hard to avoid breaking them.
Squeeze the lemon to extract the juice and mix it with 500 ml of clean water. Pour this mixture into a spray bottle.
Lightly spray the lemon water over the banana slices to help preserve their color and flavor, then sprinkle a thin layer of vanilla on top for extra aroma.
Step 3: Drying the Bananas
Place the trays into the dehydrator and dry at 120°C (about 248°F) for 20 minutes.
After this time, flip the banana slices over, spray another layer of lemon water and vanilla, and continue drying at 120°C for an additional 10 minutes. This two-step process ensures the dried banana slices are evenly crisp and golden.
The Final Result
The finished dried banana slices are irresistibly crunchy, golden, and fragrant a healthy snack that’s just as satisfying as store-bought chips. They’re perfect for the whole family, especially kids who love tasty finger foods. For best results, store the dried banana in an airtight bag or container to keep them fresh and crisp for longer.
How to Make Sugar-Coated Dried Banana
Ingredients

To prepare this sweet and crispy treat, you’ll need:
-
10 unripe green bananas (preferably “chuối sứ” for the best texture)
-
1 lemon
-
100 g of sugar
-
A pinch of white salt
-
2 pandan leaves (for extra fragrance)
-
Cooking oil
Step-by-Step Instructions
Step 1: Prepping the Bananas
Peel the green bananas and immediately soak them in a large bowl of water mixed with the juice of half a lemon and 1 tablespoon of salt. Let them soak for about 10 minutes. This step removes the sticky latex and keeps the banana flesh from turning brown.
Once soaked, pat the bananas dry with a clean towel. Slice them lengthwise into thin, even strips not too thick so they crisp up nicely, but not too thin that they break during frying.

Step 2: Frying the Bananas
Heat a generous amount of oil in a large pan over medium heat. Add the pandan leaves to infuse the oil with their natural aroma, then gently add the sliced bananas.
Fry the bananas, stirring gently and continuously to ensure they cook evenly on all sides. Keep frying until the slices turn golden and crisp. Remove them and let any excess oil drain on paper towels.
Step 3: Coating the Bananas with Sugar
In a clean pan, add 100 g of sugar and 70 ml of water. Cook this mixture over low heat for about 3 minutes, stirring occasionally until the sugar completely dissolves and forms a light syrup.
Carefully add all the fried banana slices into the pan. Stir gently so that each piece is evenly coated as the sugar begins to crystallize. When the sugar forms a dry, crunchy coating on the bananas, turn off the heat immediately.
The Final Result
The finished sugar-coated dried banana is beautifully golden with a wonderful aroma from the pandan leaves and caramelized sugar. Each bite offers a satisfying crunch, with the natural sweetness of banana blending perfectly with the sugar glaze.
Since this version uses sugar, it doesn’t keep as long as plain dried banana. To preserve its crispness, let the banana cool completely, then store it in an airtight plastic bag or container in the refrigerator. It’s best enjoyed within one week.
Easy Ways to Make Dried Banana Using Common Kitchen Tools
Making Dried Banana in the Oven
If you don’t have a specialized dehydrator, don’t worry you can still make delicious dried banana using a regular oven or even a microwave. Here’s how:
Step 1: Choosing the Right Ingredients
To get the perfect texture and flavor when making dried banana in the oven, it’s best to select “chuối sứ” (short, thick bananas) or green plantains. You can also use bananas that are just ripe but still firm they’ll hold their shape better during drying and develop a naturally sweet taste.
In addition to bananas, prepare fresh ginger and lemon, which will help enhance the aroma and prevent browning during the drying process.
Step 2: Preparing the Ingredients
Peel the bananas and slice them into thin, even pieces.
Squeeze the lemon to get about 2 tablespoons of juice.
Peel and crush the ginger, then squeeze to extract around 4 tablespoons of ginger juice.
These ingredients will give the banana slices a pleasant tang and a fresh, fragrant note.

Step 3: Marinating the Bananas
Place the banana slices in a large bowl. Add the lemon juice, ginger juice, and sugar according to your family’s taste. Gently toss the mixture so that every slice is evenly coated. Let the bananas sit for about 1 hour, allowing the flavors to soak in and the natural syrup to develop.
Step 4: Drying in the Oven or Microwave
Arrange the marinated banana slices in a single layer on a baking tray or heat-resistant plate. Place the tray in the microwave and heat for 5 minutes.
After the first round, check the bananas — at this stage, they should start releasing their natural sugars and turn slightly golden. Return them to the microwave for another 5 minutes.
Continue heating in 5-minute intervals, checking the color and texture after each round. Typically, it takes 3 to 4 cycles for the bananas to reach the ideal level of dryness and develop a beautiful golden color.
💡 Tip: If you’re using a conventional oven instead of a microwave, set it to low heat (around 100–120°C) and bake the banana slices until they become firm and slightly caramelized, flipping occasionally for even drying.
Step 5: Sun-Drying for Extra Crispness
Once the bananas are nicely dried and golden, spread them out on a clean plastic tray and place them under direct sunlight for an additional 1–2 hours. This final step helps remove any remaining moisture, making your dried banana crispier and more shelf-stable.
Step 6: Storing the Dried Banana
After sun-drying, let the bananas cool completely. Transfer them to an airtight glass jar or container, seal tightly, and store in a cool, dry place. Properly stored, homemade dried banana can stay fresh for weeks while retaining its natural sweetness and crunch.
Making Dried Banana with an Air Fryer
Using an air fryer is one of the easiest and quickest ways to make delicious dried banana at home. This method helps you achieve that perfect golden crispness without the need for deep frying, while still preserving the natural sweetness of the fruit.
Step 1: Preparing the Bananas
Start by peeling the bananas and slicing them thinly lengthwise. Thin slices ensure the bananas dry evenly and get that perfect crisp texture later on.
Next, place the banana slices in a large bowl filled with ice water, and add a little salt and lemon juice. Soak the slices for about 15 minutes. This step is important because it prevents the bananas from oxidizing and turning brown, while also giving them a refreshing, firm texture.
Once soaked, remove the bananas and let them drain completely. You can gently pat them dry with a clean kitchen towel to remove excess moisture before drying.

Step 2: Drying the Bananas in the Air Fryer
Preheat your air fryer to 160°C (320°F) for 10 minutes. Preheating helps the banana slices dry more evenly and retain their natural flavor.
Line the basket of the air fryer with parchment paper to prevent sticking. Then, arrange the banana slices in a single layer, making sure they don’t overlap.
Set the air fryer to 150°C (300°F) and dry the bananas for 5 minutes on one side. After the first round, flip the slices carefully, then continue drying for another 5 minutes at the same temperature.
For extra flavor and a touch of natural sweetness, lightly brush the banana slices with honey. Then lower the temperature to 100°C (212°F) and continue drying each side for 15 minutes. This slow drying at a lower temperature helps the bananas achieve a crisp yet chewy texture, while the honey creates a beautiful golden glaze.
💡 Tip: Depending on how thick your slices are and your personal preference, you can adjust the drying time slightly for a softer or crunchier result.
Step 3: Enjoying the Finished Product
Making dried banana with an air fryer is not only fast and convenient but also healthier than traditional frying methods. The final result is a fragrant, golden snack with a delicate natural sweetness from the banana and a subtle honey aroma.
You can enjoy these dried banana slices on their own as a light snack, pair them with yogurt or oatmeal for breakfast, or even pack them in airtight containers as a homemade treat for on-the-go munching. Plus, since air frying uses minimal oil, the result is a cleaner and more wholesome version of a beloved classic.
Making Dried Banana Using a Non-Stick Pan
If you don’t have an oven, air fryer, or dehydrator, don’t worry, you can still make delicious dried banana right on your stovetop using a simple non-stick pan. This method is quick, practical, and perfect for turning fresh bananas into a sweet, golden snack.
Step 1: Preparing the Ingredients
Start by peeling the bananas and slicing them into thin pieces about 0.3 cm thick. Consistent thin slices help the bananas cook and dry evenly, giving you a perfectly crisp yet slightly chewy texture.
To keep the banana slices from turning brown during cooking, soak them in a bowl of lemon water for about 10 minutes. The natural acidity of the lemon not only prevents oxidation but also gives the bananas a refreshing, subtle tang. Once done, drain the slices and gently pat them dry with a clean kitchen towel.
Step 2: Drying the Bananas on the Pan
Heat a non-stick pan over medium heat and pour in a generous amount of cooking oil. Allow the oil to heat up fully before adding the banana slices.
Carefully place the slices into the pan and fry them, flipping occasionally to ensure both sides turn a beautiful golden color. Keep an eye on the heat, you want the bananas to dry slowly and evenly, not burn.
Once the slices are golden and crisp, remove them from the pan and place them on a paper towel to absorb any excess oil.
Next, pour out the remaining oil, leaving just a thin layer to prevent sticking. Add a drizzle of honey to the pan, return the fried banana slices, and gently toss them until each piece is evenly coated in a fragrant, glossy glaze. This step enhances the flavor, giving the bananas a sweet aroma and irresistible taste.

Step 3: Finishing and Storing
Your pan-dried banana is now ready to enjoy crispy, lightly sweetened, and infused with a delicate honey fragrance. It’s the perfect quick snack to make at home without any special equipment.
If you don’t finish the batch right away, let the bananas cool completely and store them in an airtight container in the refrigerator. This will help maintain their freshness and crunch for several days.
Making dried banana doesn’t have to be complicated. With just a non-stick pan and a few simple ingredients, you can create a delightful homemade treat that’s perfect for sharing with family or enjoying on your own. It’s a great way to turn everyday bananas into something special!